A main page can have associated sub-pages. For example, under the Products link you may have several pages, with each page promoting a particular product category. Two main pages in Figure 2.4, About and Products, have sub-pages.
The expand button link ![]() is used to access sub-pages. Use the expand button link to edit page content or page properties or activate pages.
is used to access sub-pages. Use the expand button link to edit page content or page properties or activate pages.
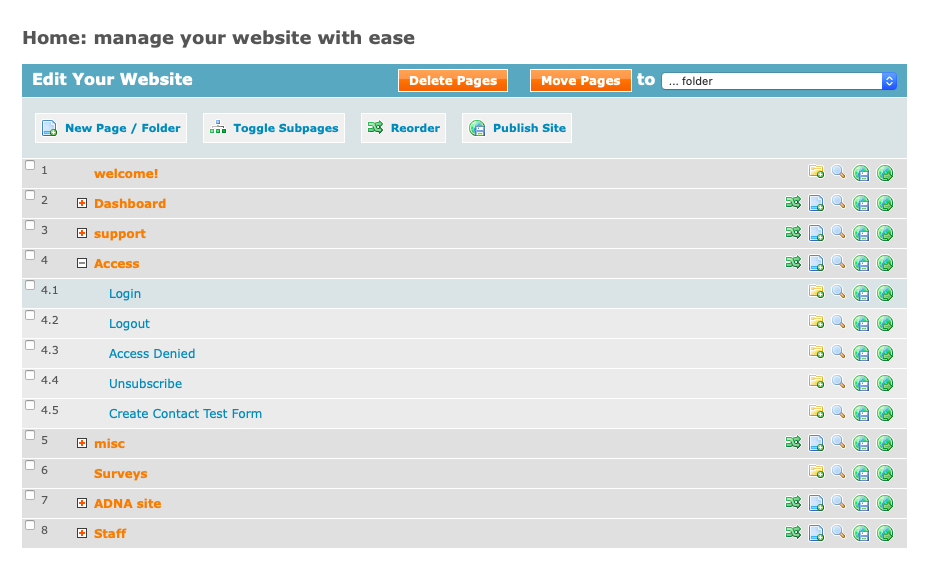
Figure 18: Manage Webpages
Other buttons that apply to each page include:
 Reorder pages– Available only for a main page when sub-pages exist
 Subfolder – Creates subfolder to hold sub-pages.
 Preview – Helps previews page before or after publishing it
 Publish page – Publishes page on to the World Wide Web
 View/Go to page – Redirects you to the page published that is currently online.
You can create a new page, provided you are within the account limits for your website by following these easy steps.
- Click on
 .
. - This will then redirect you to Create a New Page where you define the page type (a single page is a file; a page that will have sub-pages needs to be set-up as a folder), page title and filename.
- You can click in the input box besides Create the new page in position and specify where you want the new page to appear in the menu (e.g. [5] or [5.1], without brackets ). Click on Submit to create the file.
3.3 SETTING UP A SUB-MENU OR SUB-PAGE
To add sub-pages to a main page that does not currently have a sub-page,
- Click on or
 under the main page you want to create sub-pages.
 - This will then redirect you to Create a New Page where you define the page type (a single page is a file; a page that will have sub-pages needs to be set-up as a folder), page title and filename.
- For example if, 4 is the ID number for the Links page in Figure 2. To add a sub-page to the links page, you would click in the input box besides Create the new page in position and type 4.1 to create the first sub-page under Links or 4.2 for the second, 4.3 for the third, and so on.
Power Tip: If you do not want to create a "landing page" you can use the following steps to have it automatically point to a sub-page:
1) Go to the page you want the main page to redirect to, click on the Page Properties tab and copy the page's path.
2) Go to the main page, click on the Page Properties tab and do four things:
a. Ensure that the "In the Menu" is checked or "Menus to Publish" is set to either English, French or Both.
b. Change the template to None.
c. Update the path of the page from its current path to the path you copied from the other page
d. Save the page and republish the site.
To edit pages is one of the common reasons why our clients frequently use the WPO. To open a page in Edit Page mode, click on the page name (e.g. Links) in the Page column:
To edit page and its content click on the tab that reads Edit Page as shown in figure below.

Figure 19: Edit page - Main Tab
In the figure below, the text highlighted using the red circle shows the title of the page you are editing.
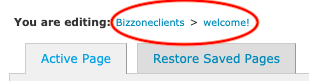
Figure 20: Title of Page being edited

Figure 21: Edit Page toolbar
As you change the details on this page, you can do the following:
-
 : This option saves your changes, but the changes will not be added to the live website until you either: a) click on Save to Website; b) use the Resave All option; or c) delete a page.
 -
 : This option saves your changes and updates the live website.
 -
 : This option let you preview the page you are editing.
The Edit Page also contains a form that you can use to submit the Page Title, Menu Text (in both English and French).
Page Title: This is used on every page, so does not need to be included in the content.
Menu text: By default this is the page title. However you can shorten it, as long menu names are often unwieldy. You may also specify the template you wish to use for the page and also if this page has to be listed in the Menu and also if the page needs to be published in both English and French
|
|
Tip: This is used on every page, so does not need to be included in the content. |

To edit the content of the Webpage use Page Content section on the page. Enter or modify the content that needs to be shown in the page here. Do not forget to Save to Draft. If you are ready to save to website then click on Save to Website after you are done. For details on how to use the content toolbar or toolbar, see section 2.5
|
|
Tip: To add a single line break you need to hit Shift-Enter. |
Clicking on the  button will effectively overwrite the current version of the page visible on your website.
Saving a draft allows you to save your changes without publishing them, as an interim save, in case you want to take a break or need approval on something you have just done before publishing it live.
This is a handy feature if you want to see how something will look before publishing it or saving it – this will open a new window showing a preview of the web page with the changes you have just made.
To Edit Page properties click on the tab that reads so next to the Edit Page tab. This should redirect to a page that looks similar to the figure below
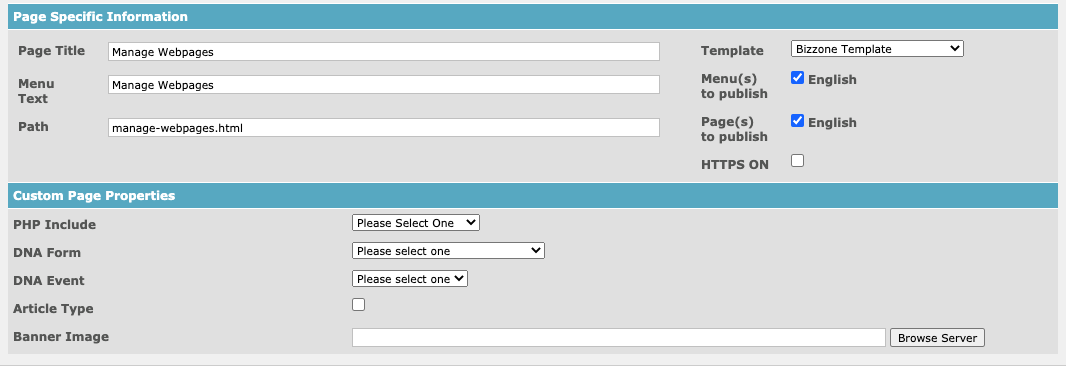
Figure 22: Edit Page Properties Page
Here is an overview of some of the main elements:
The page can be set as a SECURE PAGE by checking the box. The page will then be marked as a secure page and will require user to login.
WebPages can be restricted to groups of people using the PAGE RESTRICTED to option. Check the box beside the name of the group to whom access is to be granted. You can use the ADD ACCESS TYPE to add the group if not listed.
To remove an access type, use the REMOVE ACCESS TYPE feature. Choose the access type that needs to be deleted from the dropdown list. Click on OK at the prompt “This will remove the access type member from both the members table and page table. This may cause the loss of valuable data. Return this box to 'Choose access type' if it has been changed by mistake. Otherwise pressing save or save to web will remove access type.” This will remove the access type.
If you do not wish to delete the access type then close the prompt by closing the window of the prompt.
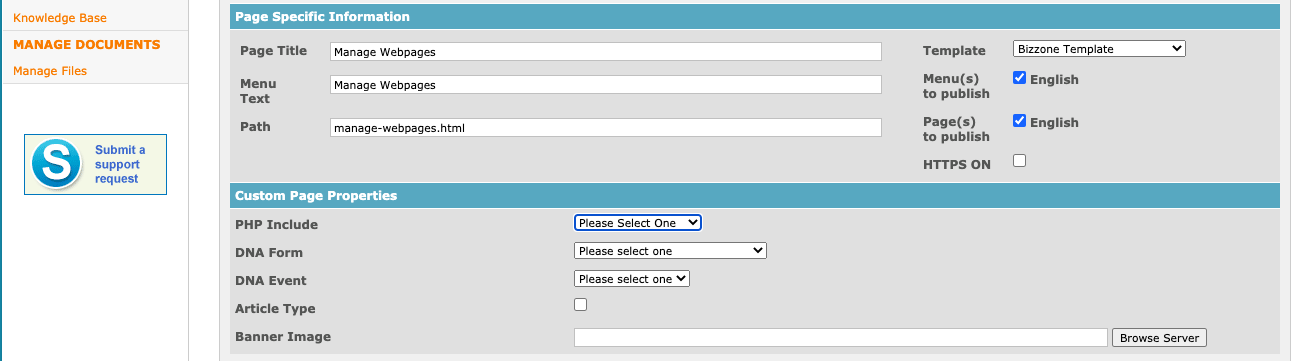
Figure 23: Edit Page Properties - Page Specific Properties
PHP include: To include a PHP script into the page you have created, type the path of the file.
Page Banner: Include Page banner by browsing through the files that have been uploaded on to the server.
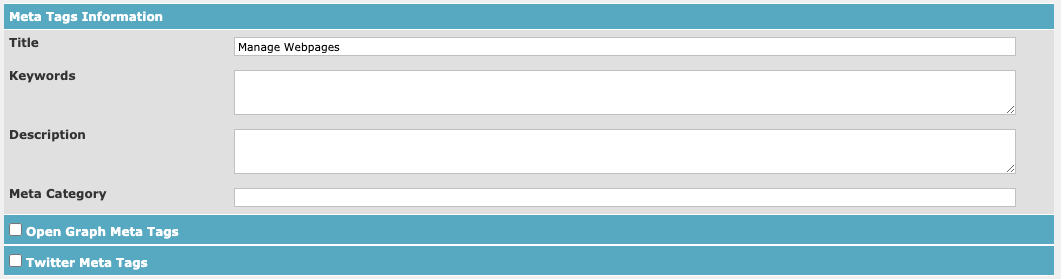
Figure 24: Meta tags
This is extra information that is added to the page to help the search engines index the site. You can create and use site-wide defaults, or you can choose to use a custom Meta tag that you define in the Title, Keywords and Description fields. (This is showing a bilingual version of the meta tags.)
Use Site: This tells the webpage that the page should be published under the domain.
Use section Meta tags: This tells the webpage that the page should use the Meta tags on the page.
Title: This is used on every page, so does not need to be included in the content.
Keywords: Search Engines like Google uses keywords to search for this page on the internet.
Description: A description of the page that you have been editing.
Path: This is the filename, and is defined when you create a new page.

Figure 25 : Edit Page properties - Advanced Feature
|
|
Note: This is a special feature that allows you to override the default path with a special path specified here. Don't change it if unnecessary.
|
To delete page go to the Manage WebPages or the Home page in WPO and select the page(s) that need to deleted using the check boxes beside the page and then click on  . This will prompt you asking if “Are you sure you want to delete the selected pages?” Click on OK if you are sure or else Cancel.
The page (file) will then be deleted and then the folder of the file is checked to find if the folder is empty. If empty, it is deleted as well.
|
|
Note: Be careful – you cannot restore a deleted page. Saving a draft allows you to save your changes without publishing them, as an interim save, in case you want to take a break or need approval on something you have just done before publishing it live.
|
In case you are trying to delete pages with sub-pages, an error will reported as can be seen in figure below.

Figure 26: Delete Pages- Error Display
Back